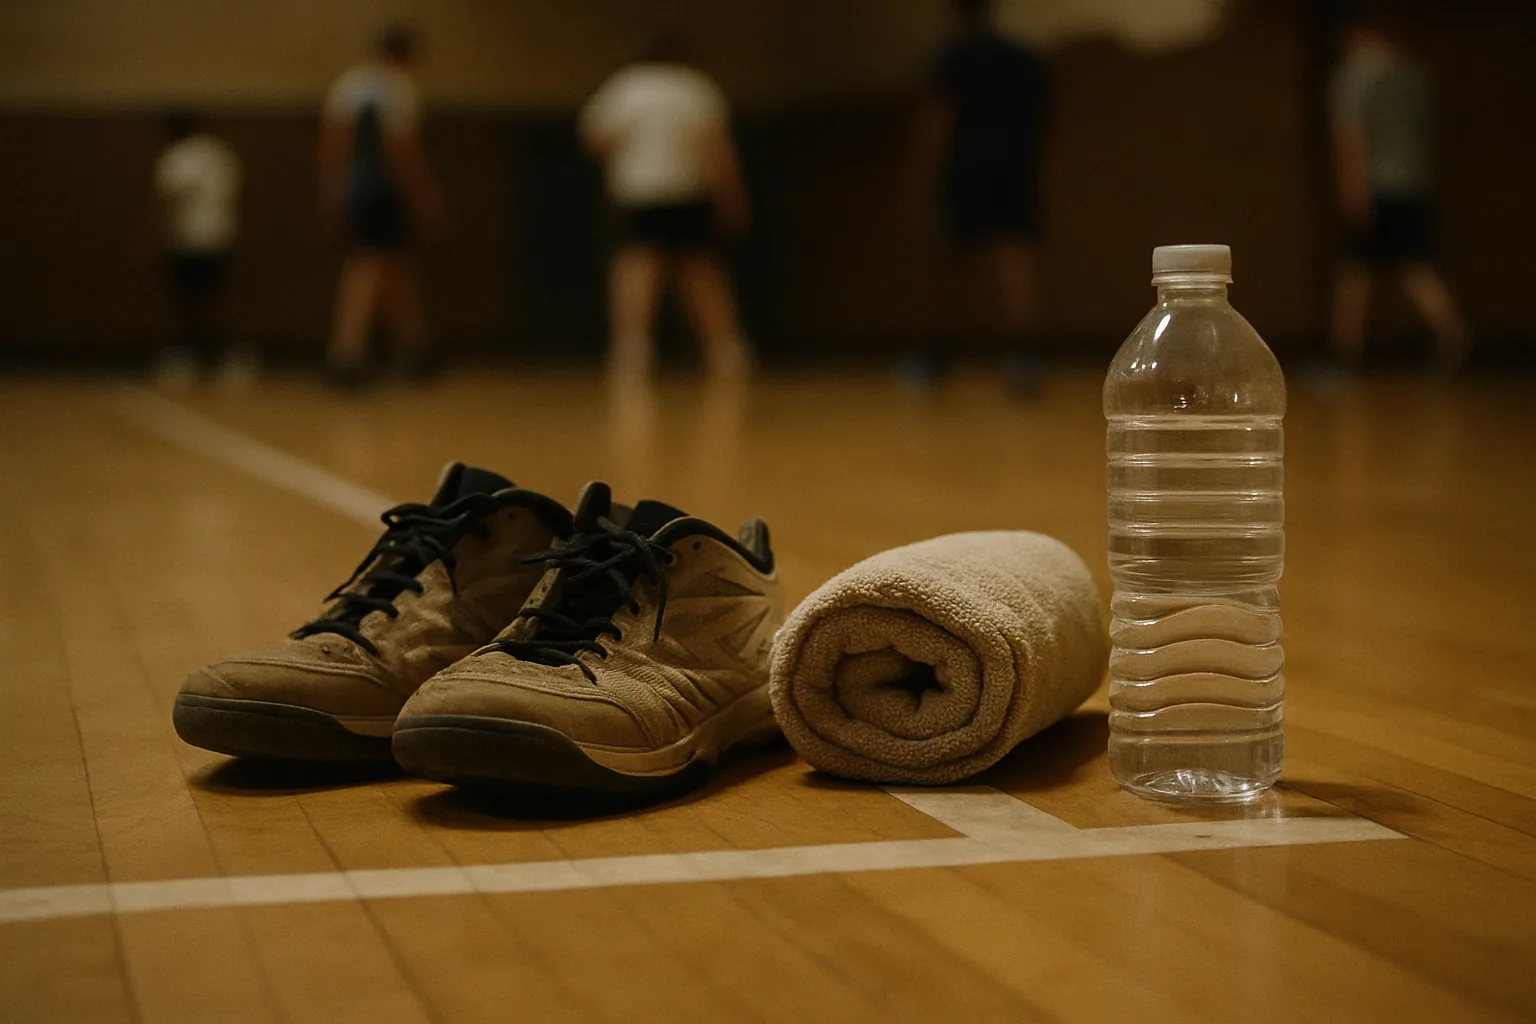
Here is your 45–60 minute practice blueprint, ready to run today. Warm up for 10 minutes, spend 30 minutes rotating through skill drills in small groups, then close with 15–20 minutes of small-sided games. That’s the whole structure. Everything below fills in the details.
This post contains affiliate links. We make a small amount when you buy through them. We only recommend products we use ourselves.
Quick setup checklist before players arrive:
- One ball per player (correct size for age — see the equipment table below)
- 8–12 cones to mark stations and boundaries
- Pinnies or colored vests to split teams
- Water bottles and a first-aid kit at the sideline
- A whistle and a printed practice plan
Age-specific quick notes:
- Ages 6–8: Keep every activity under 5 minutes. Focus on fun and first touches. Use a size 5 ball and a 6-foot hoop when possible.
- Ages 9–11: Introduce simple footwork and weak-hand dribbling. Drills can run 6–8 minutes. A size 6 ball works well here.
- Ages 12–13: Add decision-making pressure and light defensive work. Drills can stretch to 10 minutes. Move to a size 7 ball and a standard 10-foot hoop.
One honest note before you read further: the youth basketball drills in this guide are built around the games-first model, not the old “line up and take turns” approach. That shift improves how much kids enjoy practice.
Key Takeaways
Games-first, age-appropriate youth basketball practice produces more skill development and more enjoyment than drill-heavy sessions, and the right equipment and structure make the difference from the first whistle.
| Point | Details |
|---|---|
| Use the games-first sequence | Warm up, play a modified game, freeze and teach for 2–3 minutes, drill, then play again. |
| Keep lines short | Players who wait longer than 15–20 seconds disengage; use stations and small groups to maintain touches. |
| Match equipment to age | Size 5 ball and 6–8 foot hoop for ages 6–8; size 7 ball and 10-foot hoop for ages 12–14. |
| Build 2v2 and 3v3 into every practice | Small-sided games give every player more touches and faster decision-making practice than full 5v5. |
| Parentcoachdesk practice blueprint | The 60-Minute Practice Blueprint provides a printable, fillable template parent-coaches can run immediately. |
Table of Contents
- How should you structure a youth basketball practice?
- What are the best shooting drills for young players?
- Which layup drills build real confidence?
- How do you keep dribbling drills from turning into chaos?
- What passing drills actually translate to games?
- Which footwork drills help kids stop, pivot, and change direction?
- How do you teach defense without making it boring?
- Small-sided games that teach more than full 5v5
- Fun games that keep kids engaged and still build skills
- Sample practice plans and templates by age group
- How do you modify drills for mixed-ability groups?
- What equipment do kids actually need, and how high should the hoop be?
- Your printable coach and parent checklist
- What I’ve learned from watching parents coach
- Parentcoachdesk has the practice blueprint you can print tonight
- Sources
How should you structure a youth basketball practice?
The most effective youth practices follow a games-first sequence, not a lecture-then-drill sequence. Kids learn faster when they play first, feel the problem, and then receive a short explanation. The YMCA Basketball Coaching Resource Book calls this the IDEA method: Introduce, Demonstrate, Explain, Attend. The entire teach segment should take 2–3 minutes before players return to activity.
The games-first sequence
- Warm-up (10 minutes): Light movement, dynamic stretching, and a simple ball-handling activity. Keep it moving from the first whistle.
- Modified game (8–10 minutes): Start with a small-sided game that naturally exposes the skill you want to teach. Players discover the problem themselves.
- Freeze and teach (2–3 minutes): Stop play, gather players, and use the IDEA sequence. Ask one question (“What happened when nobody moved to the open spot?”), demonstrate the fix, and send them back.
- Focused drill (15–20 minutes): Run 2–3 targeted drills in stations. This is where the skill repetitions happen.
- Game (10–15 minutes): Return to a small-sided game where players can apply what they just practiced.
- Cool-down (3–5 minutes): Light stretching, a brief team huddle, and one positive observation per player if time allows.
Sample timing template
A simple 10/30/15 split works well for most youth sessions: 10 minutes of warm-up, 30 minutes of skill work in stations, and 15 minutes of game play. The YMCA Recreational Basketball Handbook.pdf) supports this structure and adds one critical rule: if players wait longer than 15–20 seconds in a line, they disengage. Split into stations or smaller groups to keep everyone moving.
Coaching scripts for freeze moments
When you stop play, keep it short and specific:
- “I noticed we kept losing the ball near the baseline. Watch what happens when we use a jump stop instead of running through.”
- “Great effort on defense. One thing: keep your hands up, not at your sides. Let’s try it again.”
For corrective feedback, the handbook recommends the sandwich method: start with a genuine positive observation, give one specific correction, and close with encouragement. Young players stay receptive when they feel seen before they feel corrected.
Pro Tip: Set up your stations before players arrive. When kids walk in and see cones already placed, they start exploring immediately instead of standing around waiting for instructions.
What are the best shooting drills for young players?
Good youth basketball shooting drills teach form before range. A child who shoots from their chest with two hands will develop bad habits that take years to undo. Start close to the basket, get the mechanics right, and distance comes naturally.
-
Form shooting (all ages): Players stand 3–5 feet from the basket and shoot with one hand only, focusing on elbow alignment, wrist snap, and follow-through. No legs, no jump. Just the shooting arm. Coaching cue: “Hold your finish until the ball hits the net.” Run for 5 minutes per group. Ideal for groups of 3–4 at each basket.
-
Catch-and-shoot (ages 9–13): A partner or coach passes from the elbow. The shooter catches, sets their feet, and shoots in one fluid motion. Coaching cue: “Catch it, square up, shoot — three beats.” Ages 9–11 work from 8–10 feet; ages 12–13 can push to 12–15 feet. Run 8 minutes per group.
-
One-dribble pull-up (ages 10–13): Player starts at the elbow, takes one dribble toward the basket, plants with a jump stop, and shoots. Teaches rhythm and footwork together. Coaching cue: “One dribble, two feet, shoot.” Keep groups to 3 players so reps stay high.
-
Layup progressions (all ages): Begin with a walk-through at slow speed, then a jog, then full speed. Right hand from the right side, left hand from the left. Ages 6–8 can start from 4 feet away and simply step up to the board. Ages 9–11 add the correct two-step footwork. Ages 12–13 practice off the dribble from the wing.
-
Spot shooting (ages 9–13): Mark 5 spots around the key with cones. Players rotate through spots, shooting one ball from each. Track makes, not misses. Coaching cue: “Same shot, same spot, same form every time.” Great for 10-minute station rotations.
For basketball shooting form in kids, the single most common error is shooting from the hip with two hands. Catch it early and correct it gently. One hand, close range, every session.
Which layup drills build real confidence?
Layups are where young players feel the most pressure and make the most mistakes. The fix is almost always footwork, not athleticism. Correct the takeoff foot first, and the rest follows.
-
Step-up layup (ages 6–8): Player stands 3 feet from the basket on the right side. They step with the left foot, then the right, and lay the ball softly off the backboard with the right hand. No dribble. No speed. Just the footwork pattern. Repeat 10 times, then switch sides. Common mistake: jumping off the wrong foot. Tap the correct knee gently to cue the right takeoff.
-
Two-line layup (ages 9–13): Classic two-line drill with one line at half court and one line at the wing. The ball line dribbles in and finishes; the rebounding line catches the ball and passes to the next person in the ball line. Rotate lines every 3 minutes. Coaching cue: “Soft off the glass, not the rim.” Add a passive defender for ages 12–13 to simulate game pressure.
-
Mikan drill (ages 9–13): Player stands under the basket and alternates left-hand and right-hand layups without letting the ball hit the floor. The goal is a continuous rhythm. Start with 10 makes, then build to 20. This drill builds both-hands finishing faster than almost anything else. Coaching cue: “Stay under the basket, don’t drift.”
-
Reverse layup progression (ages 11–13): Once players can finish with both hands from the front, introduce the reverse layup from the baseline with footwork walkthrough first, then add a dribble. Age modification: ages 11–12 practice the footwork without a ball first; ages 13 add a live dribble from the wing.
How do you keep dribbling drills from turning into chaos?
The answer is stations. When every player has a ball and a defined space, chaos disappears. These basketball training drills work best when you set up 3–4 stations and rotate every 4–5 minutes.
-
Stationary ball-handling circuit: Players stand in their own space and cycle through common dribbling moves. Start slow, build speed. Ages 6–8 do simple right-hand and left-hand dribbles in place. Ages 9–11 add crossovers. Ages 12–13 add combo moves.
-
Cone weave: Set 6 cones in a straight line, 3 feet apart. Players dribble through with their right hand going out, left hand coming back. Time each run. Weak-hand progression: require the left hand only for one full round before allowing the right.
-
Partner mirror dribble: Two players face each other 5 feet apart. One leads with dribble moves; the other mirrors the footwork without a ball. Switch roles every 90 seconds. Builds lateral quickness and court awareness simultaneously.
-
Competitive relay: Split into two groups. Each player dribbles to a cone and back, then tags the next player. First team done wins. Add a weak-hand-only rule to make it harder. Keep groups to 4–5 players so the wait is short.
-
Dribble freeze tag: One player tries to tag others. Tagged players freeze in a wide stance with their ball. A free player can unfreeze them by dribbling through their legs. Every player has a ball the entire time. This one works especially well for ages 6–9.
-
Wall dribble (weak-hand focus): Players stand 2 feet from a wall and dribble with their non-dominant hand only, keeping the ball below waist height. 60 seconds per round. Simple, quiet, and surprisingly effective for building left-hand control.
What passing drills actually translate to games?
Passing is the skill most coaches rush past, and it shows in games. Kids who can pass accurately under light pressure are far more useful teammates than kids who can only dribble. These drills build accuracy, timing, and early decision-making.
-
Pair chest pass: Two players stand 8–10 feet apart and pass back and forth, focusing on stepping toward the target and snapping both wrists on release. Coaching cue: “Step, push, thumbs down.” Run for 3 minutes, then switch to bounce passes for 2 minutes.
-
Gates passing: Set up pairs of cones as “gates” across the court. Players must pass through a gate to score a point. The receiver calls for the ball before the passer releases it. This teaches timing and communication without a defender. Ages 6–8 use 4 gates; ages 9–13 use 6–8 gates and add movement.
-
Overhead pass relay: Players line up in two lines facing each other, 12 feet apart. The ball travels down the line using only overhead passes. Coaching cue: “Release above your forehead, not behind your head.” Good for ages 9–13 as a warm-up activity.
-
Press-break passing (ages 11–13): Two passers stand at half court. A passive defender stands between them. The passer must read the defender and choose which side to pass to. Start with a stationary defender, then allow the defender to move. This is the first step toward real decision-making under pressure.
For younger players, keep passing drills to 3–4 minutes each. Their attention and arm strength both have limits, and a tired arm produces bad habits faster than almost anything else.
Which footwork drills help kids stop, pivot, and change direction?
Most turnovers at the youth level come from footwork, not bad decisions. A player who can’t stop cleanly or pivot without traveling will struggle no matter how good their shooting form is. These drills take 5 minutes each and need almost no equipment.
-
Jump stop practice: Players jog toward a cone and land on two feet simultaneously on your whistle. Hold the landing for 2 seconds before moving. Coaching cue: “Land like you’re sticking to the floor.” Safety note: teach players to land with soft knees, not locked legs.
-
Pivot and pass: Player catches a pass, executes a front pivot, and passes to a new target. Then a reverse pivot and pass. Alternate for 5 minutes. Coaching cue: “Keep your pivot foot planted until the ball leaves your hands.”
-
Defensive slide circuit: Mark two cones 8 feet apart. Players slide laterally from cone to cone without crossing their feet, staying low in an athletic stance. 30 seconds on, 15 seconds rest. Ages 6–8 do 2 rounds; ages 9–13 do 4 rounds.
-
Closeout drill: Player starts under the basket. Coach or partner holds the ball at the three-point line. Player sprints out, then chops their feet and extends a hand in the shooter’s face. Coaching cue: “Sprint, then slow down — don’t fly past them.”
-
T-drill (ages 10–13): Set cones in a T shape. Players sprint forward, shuffle left, shuffle right, shuffle back to center, then backpedal to start. Time each run. This builds change-of-direction speed and lateral quickness in under 3 minutes per player.
Landing mechanics matter more than speed at this age. A child who lands with locked knees on every jump stop is building a habit that increases injury risk over time. Correct it early, gently, and often.
How do you teach defense without making it boring?
Defense is the skill kids resist most and need most. The secret is making it competitive. When defense has a clear win condition, kids buy in immediately.
-
Defensive stance and slides: Players hold a low stance (knees bent, back flat, hands out) for 10 seconds, then slide on command. Coach calls “left,” “right,” “back,” and “sprint.” Run for 90 seconds. Red flag: players standing upright or dropping their hands to their knees. Correct immediately.
-
1v1 containment: Offensive player starts at the elbow with a ball. Defender starts in front. Offense tries to get to the basket; defense tries to stay between the ball and the basket without fouling. No stealing allowed yet. Coaching cue: “Stay between the ball and the basket, not between the player and the sideline.”
-
Help-side shadow: Three players: one with the ball at the top of the key, one on the wing, one defender guarding the wing. The defender practices dropping to help-side position when the ball moves away. No live play, just positioning. Ages 11–13 only.
-
Recovery sprint: Offense gets a 2-step head start toward the basket. Defense must sprint to recover and take a charge position or force a difficult shot. Teaches effort and positioning simultaneously. Age modification: ages 9–10 use a 1-step head start; ages 11–13 use 2–3 steps.
Avoid teaching zone defense to players under 10. Breakthrough Basketball recommends keeping younger players in man-to-man situations so they develop individual defensive habits before learning team schemes. Zone defense can mask poor individual fundamentals for years.
Small-sided games that teach more than full 5v5
The Jr. NBA and Breakthrough Basketball both recommend 2v2 and 3v3 as the primary teaching formats for players under 12. More touches, more decisions, more learning per minute. Full 5v5 is a performance format; small-sided games are a development format.
-
2v2 with no dribbling: Two offensive players can only pass and cut to score. Forces spacing, communication, and reading the defense. Teaching focus: “If your defender turns their head, cut hard to the basket.”
-
3v3 with a point for passing: Every completed pass before a shot scores a bonus point. Encourages ball movement and punishes isolation play. Run for 4 minutes, then rotate teams.
-
3v3 pick-and-roll intro (ages 11–13): One player sets a screen; the ball handler uses it. No complex rules, just the basic action. Coaching focus: “Screener, hold your position. Ball handler, wait for the screen before you go.”
-
2v2 drive-and-kick: Offense must drive to the paint before shooting. If the defense collapses, kick it out to the open player. Substitution guidance: rotate a new pair in every 3 minutes so everyone gets equal time.
-
3v3 cutthroat: Three teams of 3. Two teams play; the third waits. If the defense stops the offense (rebound or turnover), the defense becomes offense and the waiting team comes in. Fast, competitive, and kids love it.
These formats also solve the playing-time problem. Every player gets the ball regularly, which means every player develops.
Fun games that keep kids engaged and still build skills
Engagement is a skill, too. A player who loves practice shows up ready to work. These games feel like play and function like drills.
-
Beat the Coach: Coach shoots from a spot. Players take turns shooting from the same spot. If a player makes it before the coach does, the coach moves to a harder spot. Kids are highly motivated to beat the adult. Works for all ages.
-
Knockout (modified): Two players start at the free-throw line, each with a ball. The first player shoots; if they miss, they must rebound and score before the second player does. If the second player scores first, the first player is out. Ages 6–8 shoot from 6 feet; ages 9–13 from the free-throw line. Safety note: remind players to watch for collisions near the basket.
-
Gates relay: Set up 4–6 cone gates across the half court. Players dribble through as many gates as possible in 60 seconds. Count gates, then try to beat your own score. Builds ball control and spatial awareness without any waiting.
-
Red light, green light dribbling: Coach calls “green light” (dribble forward), “red light” (stop with a jump stop), and “yellow light” (dribble in place). Perfect for ages 6–8. Teaches ball control and listening simultaneously.
-
Dribble tag: Every player has a ball and dribbles within a defined area. Players try to knock away others’ balls while protecting their own. Last player dribbling wins. Age note: use a smaller area for ages 6–8; larger for ages 9–13.
Any of these games can become a teaching moment. When you see a pattern (everyone losing the ball on the same side, for example), freeze the game, name what you saw, demonstrate the fix, and restart. That’s the IDEA method in a 90-second window.
Sample practice plans and templates by age group
These templates are built from YMCA youth basketball practice plans and the NBA/USA Basketball youth guidelines. Print one, bring it to practice, and adjust on the fly.
Ages 6–7 (30-minute practice)
- 0:00–0:05: Arrival activity (dribble in personal space)
- 0:05–0:12: Warm-up game (Red Light, Green Light dribbling)
- 0:12–0:22: Two stations rotating every 5 minutes (form shooting at 4 feet, step-up layups)
- 0:22–0:28: Small-sided game (2v2, no dribbling)
- 0:28–0:30: Cool-down and one team cheer
Ages 8–9 (40-minute practice)
- 0:00–0:07: Warm-up (dynamic movement + ball-handling circuit)
- 0:07–0:17: Two stations (cone weave dribbling, catch-and-shoot from 8 feet)
- 0:17–0:27: Layup progressions (both hands, jog speed)
- 0:27–0:37: 3v3 small-sided game
- 0:37–0:40: Cool-down stretch
Ages 10–11 (50-minute practice)
- 0:00–0:08: Warm-up (dynamic stretch + partner mirror dribble)
- 0:08–0:20: Three stations rotating every 4 minutes (spot shooting, cone weave, pair passing)
- 0:20–0:30: Layup drill (Mikan drill + two-line layup)
- 0:30–0:42: 3v3 with drive-and-kick rule
- 0:42–0:50: Cool-down, feedback, and team huddle
Ages 12–13 (60-minute practice)
- 0:00–0:10: Warm-up (T-drill + ball-handling combo moves)
- 0:10–0:25: Three stations rotating every 5 minutes (one-dribble pull-up, press-break passing, defensive slides)
- 0:25–0:40: Layup and finishing work (Mikan, reverse layup, contested layup)
- 0:40–0:55: 3v3 cutthroat with pick-and-roll rule
- 0:55–1:00: Cool-down, sandwich feedback, team close
Practice frequency and planning notes:
- Ages 6–9: 1–2 practices per week, 30–40 minutes each
- Ages 10–11: 2 practices per week, 45–50 minutes each
- Ages 12–13: 2–3 practices per week, 55–60 minutes each
- Always include at least one full rest day between sessions
- The NBA and USA Basketball guidelines advise limiting organized participation by age to reduce overuse and burnout, with minimum rest days built into the weekly schedule
For a fully formatted, downloadable version, the 60-Minute Practice Blueprint at Parentcoachdesk gives you a printable template you can fill in before each session.
How do you modify drills for mixed-ability groups?
Mixed-ability groups are the norm, not the exception. A 10-year-old who has played three years and a 10-year-old who just started are not the same player. Group by skill, not age.
-
Identify three skill tiers: Beginner (still learning basic control), Developing (can execute the skill in isolation), and Ready-to-Advance (can execute the skill under light pressure). You’ll know within 10 minutes of watching them.
-
Modify by three variables: Space (smaller court or shorter distance for beginners), time (more time to complete the action), and decision complexity (remove the defender first, then add a passive one, then an active one). Progress one variable at a time.
-
Add defenders last. The YMCA practice plan guidance recommends isolating mechanics first, then adding movement, then adding a defender, then putting the skill into a small-sided game. Rushing to add a defender before the skill is stable just produces frustration.
-
Fix common red flags quickly: Ball handler looking down at the ball (use a “heads up” cone at eye level), shooter using two hands (return to one-hand form shooting), defender standing upright (tap their knees to cue the stance). Address one red flag per player per practice, not all of them at once.
-
Use the sandwich method for corrections. Start with what they did well, give one specific fix, and close with genuine encouragement. Young players who feel criticized shut down. Young players who feel coached lean in.
For players with different learning needs, Parentcoachdesk has a dedicated guide on adaptive and neurodivergent athletes with specific drill modifications and communication tips.
What equipment do kids actually need, and how high should the hoop be?
The right equipment makes a measurable difference in skill development. A child shooting at a 10-foot hoop with a size 7 ball at age 7 will develop compensatory mechanics (two-hand push shots, hip-driven launches) that take years to correct. The NBA and USA Basketball youth standards address this directly, recommending age-appropriate equipment to protect mechanics and build confidence.
| Age group | Ball size | Recommended hoop height |
|---|---|---|
| Ages 6–8 | Size 5 | 6–8 feet |
| Ages 9–11 | Size 6 | 8–9 feet |
| Ages 12–14 | Size 7 | 10 feet (standard) |
Lower baskets and smaller balls for younger players improve shooting mechanics and success rates, which supports confidence and keeps kids coming back to the sport.
Safety checklist for practice setup:
- Check the court surface for wet spots, debris, or uneven flooring before players arrive
- Confirm the hoop is at the correct height and securely mounted
- Place water bottles within reach of every player, not just at the sideline
- Have a basic first-aid kit (ice pack, bandages, gloves) at the bench
- Know the location of the nearest phone or emergency contact before practice starts
- Remind players of the jump-stop landing rule (soft knees) at the start of every session
Practice length guidance from USA Basketball:
The NBA/USA Basketball youth guidelines recommend keeping organized practice time age-appropriate. Younger players need shorter sessions with more movement variety; older players can handle longer focused work. Always build in rest and recovery, and avoid scheduling back-to-back intense sessions on consecutive days.
For a complete gear list by age, the Parentcoachdesk basketball gear guide covers balls, shoes, and hoop options with specific product recommendations.
Your printable coach and parent checklist
Print this before every practice. It takes 90 seconds to run through and prevents the most common setup problems.
What to bring:
- Balls (one per player, correct size for age group)
- 8–12 cones or poly spots
- Pinnies or colored vests (at least one set)
- Whistle
- Printed practice plan
- Water bottles (one per player minimum)
- Basic first-aid kit: ice pack, bandages, nitrile gloves, emergency contact list
- Your phone, charged
Pre-practice setup checklist (arrive 10–15 minutes early):
- Mark station boundaries with cones before players arrive
- Set balls out at each station so players can start immediately
- Check hoop height and adjust if needed
- Identify any court hazards and address them
- Review your practice plan one more time and set a timer for each block
Emergency reminder (post this at your bench):
Ice and first aid at the bench. Emergency contact list in the kit. Nearest phone: [your phone]. Call 911 first, then notify parents.
For a complete gear checklist organized by role, the parent-coach gear guide at Parentcoachdesk covers everything from bench bags to coaching boards.
What I’ve learned from watching parents coach
The coaches who get the best results from their kids are almost never the ones who know the most basketball. They’re the ones who keep practice moving, stay calm when a drill falls apart, and make every player feel like they belong on the court.
Here’s the thing most coaching clinics won’t tell you: the 2–3 minute teach window is not a limitation. It’s a gift. When you know you only have 2 minutes to make a point, you stop trying to explain everything and start choosing the one thing that matters most right now. That constraint makes you a better coach.
The games-first model from the YMCA coaching resource works because it respects how kids actually learn. They don’t absorb a skill by watching a demonstration. They absorb it by trying something, failing, feeling the gap, and then receiving a short, specific correction at exactly the right moment. Your job is to create the conditions for that moment, not to fill every minute with instruction.
One more thing worth saying plainly: equal touches matter more than equal playing time. A player who gets the ball 15 times in a 3v3 game learns more than a player who plays 20 minutes in a 5v5 game and touches the ball four times. Design your practice around touches, and the development takes care of itself.
For more on how to handle the emotional side of coaching your own child, the parents’ guide to youth sports at Parentcoachdesk is worth reading before your next season starts. And if you want a deeper look at age-specific practice design, the 8–10 practice guide walks through a full session with coaching notes.
Parentcoachdesk has the practice blueprint you can print tonight
You’ve got the drills. Now you need the structure to hold them together. The 60-Minute Practice Blueprint at Parentcoachdesk gives you a fillable, printable session template built specifically for parent-coaches running youth basketball practices with minimal prep time. It includes the timing blocks, station rotation guides, and coaching cue cards you can hand to an assistant parent on the sideline.
No agency, no certification required. Just a clean, practical plan you can run with a group of 6-year-olds or 13-year-olds without changing the format. Sign up for the Parentcoachdesk newsletter and get the printable templates delivered to your inbox, along with age-specific practice updates throughout the season. The blueprint is the fastest way to walk into practice feeling prepared instead of improvising from memory.
Sources
These are the primary sources used throughout this guide. Each one is free to access and worth bookmarking before your season starts.
- Youth Basketball Guidelines - NBA/USA Basketball
- Skills and drills for players — USA Basketball
- Basketball Coaching Resource Book (YMCA)
- Coaching Youth Basketball: What to Teach at Each Age Level (7-14) — Breakthrough Basketball
- Nba
- Skills and drills archives — Jr. NBA